How to test an Engagement Plan?
Debugging engagement plans can be tricky as it’s difficult to know exactly what is happening to your contact. This guide will talk you through debugging an engagement plan.
Below is a plan I’m going to use in the debugging example. If you want to read more thoroughly about each of the components of Engagement Plan, you can take a look at this guide.
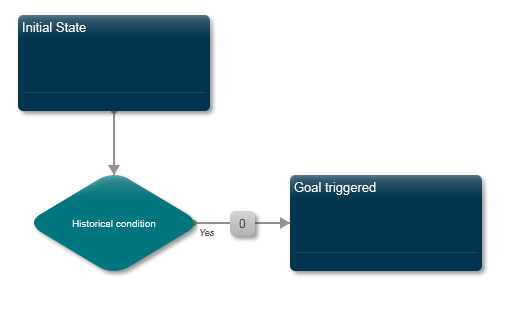
Initial State

Condition
Goal Triggered state
No specific settings.
Setting up the test environment
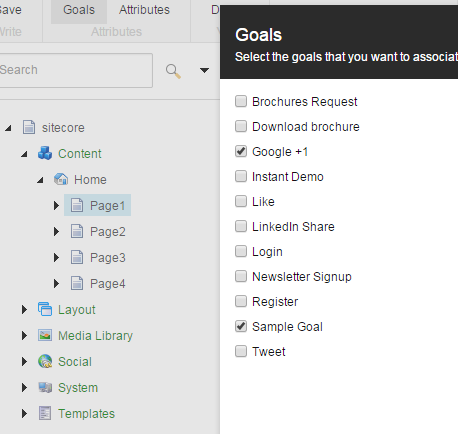
Assign goals
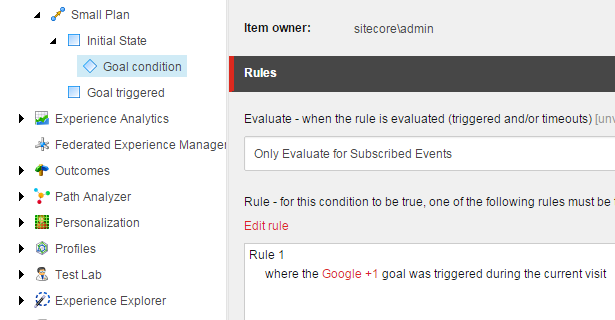
Sample goal (to trigger transition between states) and Google +1 goal (to fit the condition) should be assigned to some sample item, other than Home.
-
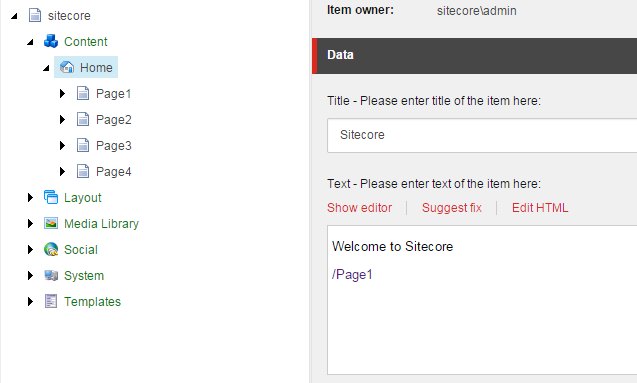
Add a link from Home page to your sample page:
-
Assign a goal to this sample page (Home/Page1)
Create buttons
You can download Sample layout.aspx with needed buttons and textboxes here
Or, if you want to use own layout to test, add there the next three code pieces.
Create an ‘Identify’ button
If you do not identify your user, you will see GUIDs in the engagement plan report.
Create a button that identifies your contact - you could also install Web Forms for Marketers and create a form that creates and logs in a user (this will identify the user in the background). Because there is absolutely no connection between ASP.NET membership and xDB contacts, you can identify your user by anything you want for testing purposes:
Tracker.Current.Session.Identify("KateTest");
Set the user’s first name. There is no need in that, but just makes debugging easier:
var firstName =  Tracker.Current.Contact.GetFacet<Sitecore.Analytics.Model.Entities.IContactPersonalInfo>("Personal");
facet.FirstName = "Kate";
Create an ‘Enroll’ button
Create a second button that enrolls the user in the Initial State of your engagement plan:
Tracker.Current.Contact.AutomationStates().EnrollInEngagementPlan(planID, stateId)
Create an ‘End Session’ button
End the session by calling:
Session.Abandon();
This forces data to be flushed to the xDB.
Publish and deploy
Make sure you deploy and publish everything (including the engagement plan), or use live mode (master database used) to run the test.
Debugging an engagement plan
Have the following interfaces open:
- Sitecore Marketing Control Panel
- Robomongo
Step 1: Open an anonymous browser session
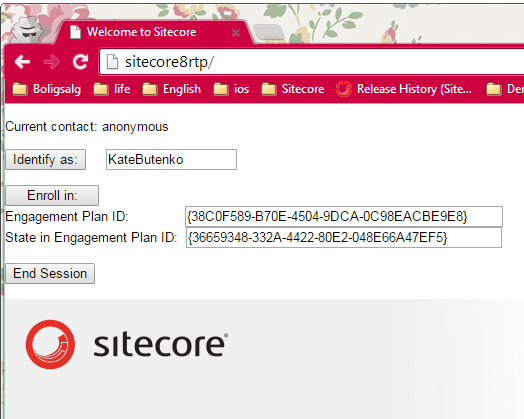
Step 2: Identify your user
This step actually can be omitted, but it is recommended if you do not want to see only IDs in Marketing Control Panel and compare numbers and letters. After you have called Identify, you will immediately have a new contact in xdb.Contacts in the analytics database. You may need to skip through a bunch of contacts if you already have a lot of data:
db.Contacts.find().skip(390)
NB: Your contact may not be the last contact to be entered because of random mongo data access, but it usually is.
This is what you should see:
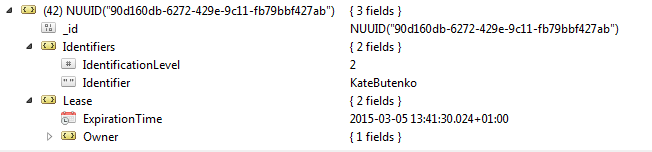
Note that even though we have set FirstName, we are not seeing it in the database. This is because we assigned FirstName after calling Identify. Identify calls FlushContactToXdb method that flushes the data we had by that moment. Other changes will be saved in session and flushed when the session ends.
Important! Never call the
FlushContactToXdbmethod yourself. It may cause data instabilities.
Step 3: Enroll contact in engagement plan
Enroll contact in engagement plan (in our example, we specify a plan ID and state ID, and press ‘Enroll’). Note that you will not see any changes in the Marketing Control Panel after enrolling the contact because this change exists only in session and the session is still active. You can check db.Contacts, db.AutomationStates and db.Interactions to confirm.
Step 4: End the session
Press your ‘end session’ button. Now check db.AutomationStates.
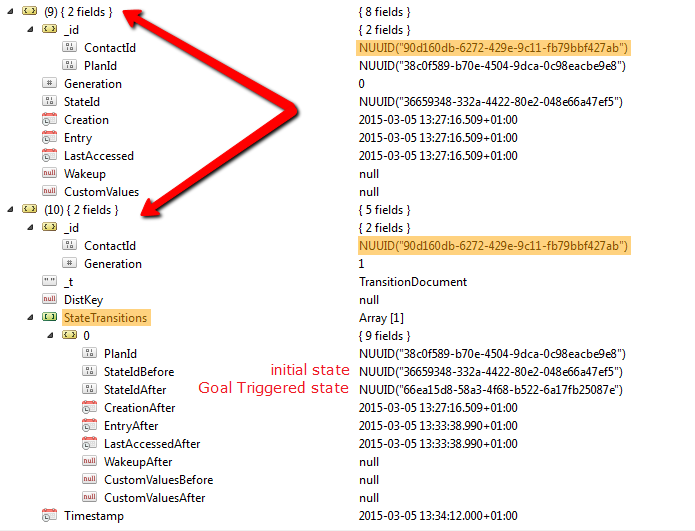
You will see a document that looks like this:
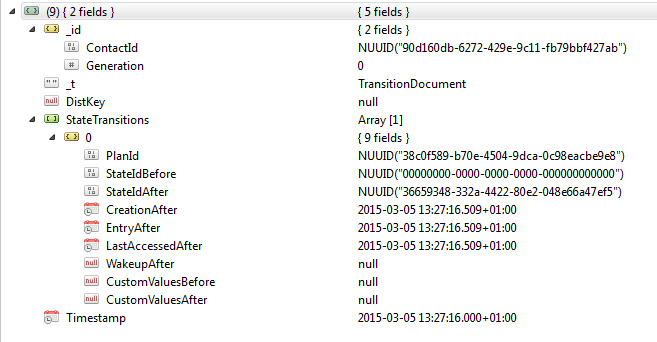
Note that this document has a StateTransition field, where StateIdBefore is nullID because this is the first state we have entered into, and StateIdAfter is an id of our Initial State.
This document with StateTransition is created by AutomationStateManager.SaveChanges method, which is called by SaveAutomationRecords processor from <submitContact> pipeline. <submitContact> pipeline is called from FlushContactToXdb, which is called when we end the session.
IMPORTANT! Never call
AutomationStateManager.SaveChangesmethod yourself. It may cause instability of data.
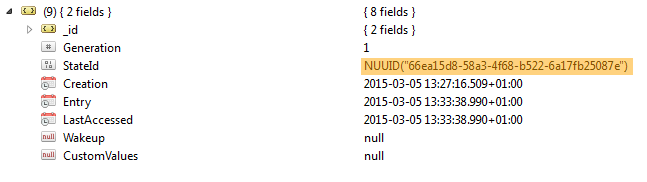
Now you need to wait until this document looses its StateTransition field and looks like this:
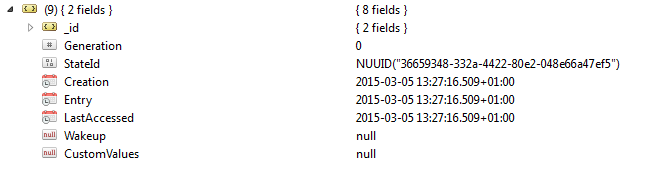
This means that engagement automation has processed StateTransition and moved our contact to the Initial State.
Check the Marketing Control Panel
Select your engagement plan in the Marketing Control Panel tree and select Supervise. Select Initial State and ‘View’ in the Contacts chunk in the ribbon. You should see your visitor there:
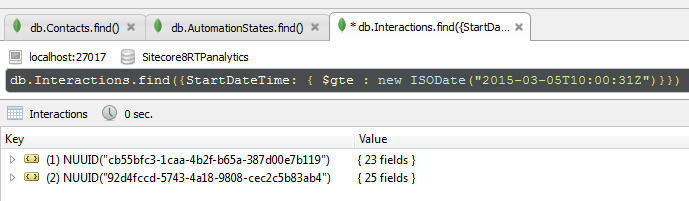
Check db.Interactions
There should be an additional interaction:
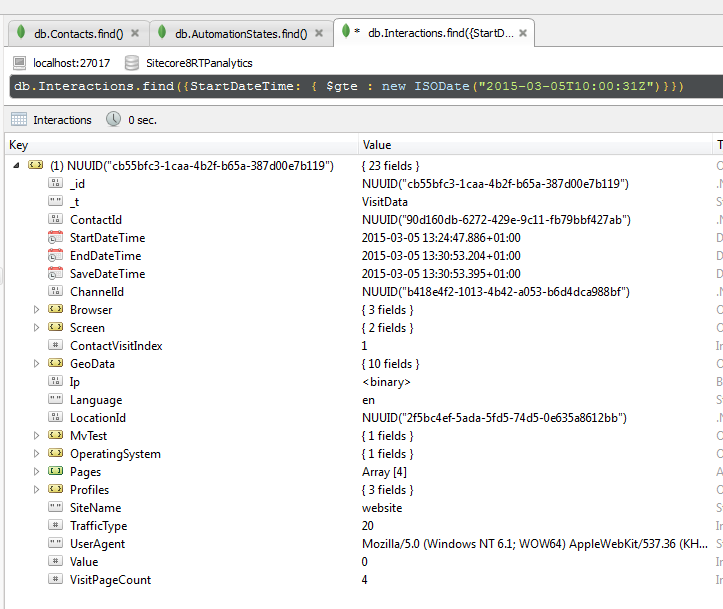
Use the following query as a guide (change the StartDateTime value):
db.Interactions.find({StartDateTime: { $gte : new ISODate("2015-03-13T14:00:31Z")}})
Check db.Contacts
The contact that we saw after step 2 (identifying) now gets additional fields:

5. Submit Sample Goal
Now let’s return to browser page and go to Page1, which as we remember has Sample Goal assigned and should move our contact through the Engagement Plan.
6. End session again, for our data to get to xDB.
Now check your db.AutomationStates.
You should see there an old document, processed, and a new document like next:
The new document should contain StateTransition with transferring from Initial State to Goal Triggered state.
Now you should wait until this document looses its StateTransition field and merges together with previous document:
It means, that engagement automation has already processed StateTransition and moved contact from Initial State to Goal Triggered state.
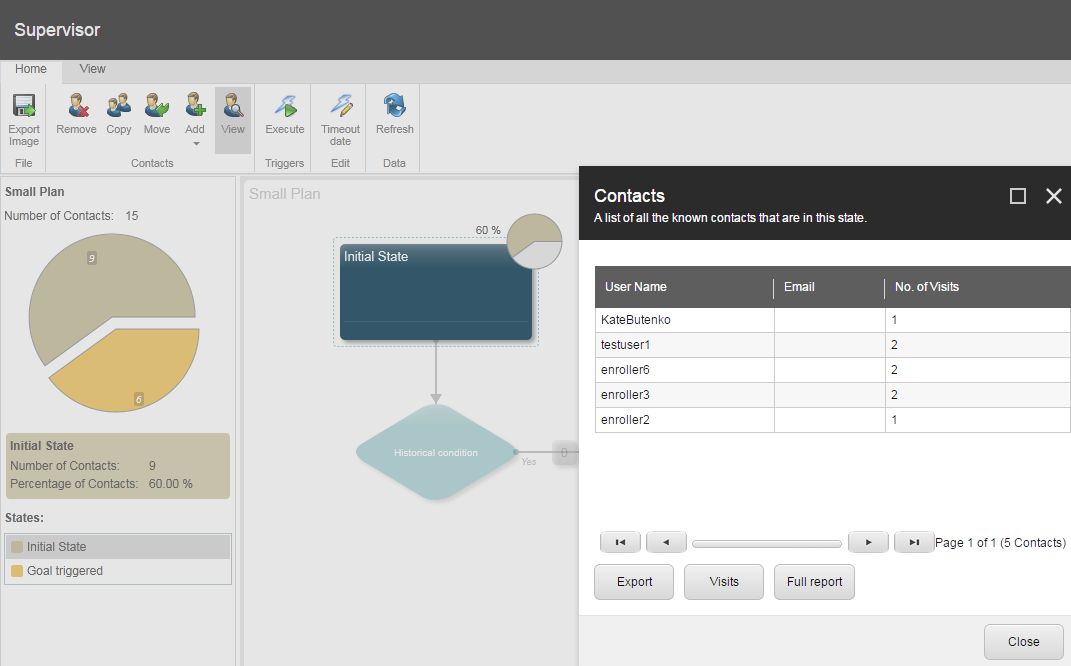
Now check Marketing Control Panel, plan’s Goal Triggered state.
There should be our “KateButenko” contact:

You can also check db.Interactions collection
to reassure that your second interaction has appeared there:
Happy debugging of Engagement Plans!